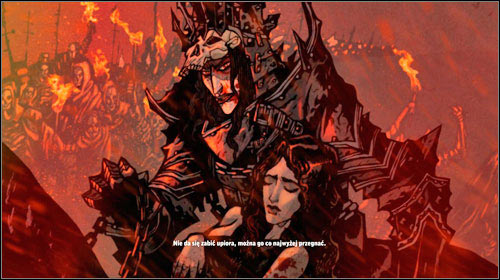
From the beginning of the episode, you will have to manage Prince Stennis, who is staying to negotiate with King Helselt. Very soon everything will escalate into a fight and the king will accidentally splash blood on the altar. This will lead to a curse that will cover the earth. Ghosts will appear everywhere, the sun will be hidden behind black clouds, a hundred elves with Iorveth and Geralt will appear on the shore. You need to cleanse Saskia before the magical owl appears. The owl will lead you to the right place, protecting you with magic. It is important that you do not go outside the circle. Occasionally drive away ghosts from the bird. In the city, talk to the sorceress and also to Saskia.
When you follow the dwarf into the room, you need to distribute skill points. Then go to the tavern. If you don't want additional quests, go out into the fresh air. After making pompous speeches, raise your glass. The girl was poisoned. Philippa will be able to cure her, but she needs to find the immortelle root, the grove of memory and the royal blood.
Walkthrough of the game The Witcher 2 - Underground Life
Start searching for healing herbs. First, visit the local tavern, where Zoltan is drinking with his comrades. Find out about the mine - it is boarded up and very mysterious. You promise to help kill the raging monsters. Zotlan, Yarpen, Sheldon will be waiting for you at the mine at noon. Before descending into the dungeon, drink a number of elixirs. Pay attention to “Swallow” and “Cat”.
There are only “corpse eaters” inside, but the right door is locked. Sheldon will say that previously there was a chief digger named Balin Fergusson. He must have the key. We need to find Balin's corpse. He's in the room next door. Read the diary. You will find out what he gave to his four assistants.
Go forward, sometimes turning for the next key. When you open the last door, the medallion will begin to vibrate. A duckbill will appear around the bend. He is a slow and weak opponent. You need to use Quen. When you kill him, take the grass and blow it to Philippa.
Walkthrough of the game The Witcher 2 – In Search of Magic
We need to look for the second component for the potion. This is a magical artifact. Philippa does not know where to find him, but she will give a recommendation to go to the headman - Sicil. He will say that there is one place where many sorcerers are drawn. Go to the indicated place.
Get out of the city through the northern gate, go through the ford, go up the slope where you can see the tower. One of the nests contains a huge crystal that begins to affect Geralt's medallion. Take the crystal and get ready to fight the harpies. The Aard sign will help a lot. When you kill everyone, go to Philippa.
Unfortunately, you will have to look for a couple more similar artifacts. She will say that the crystal contains someone's dream. Geralt will think that the harpy who built the nest was a dream thief. When you talk to the sorceress, you will find out that these harpies previously lived near the old quarry, but headman Cecil closed it and does not want to open it. Luck - the dream that is enclosed in the crystal belongs to him! Go to the headman. After your explanation, he will open the gate.
The Witcher 2 gameplay continues. Getting to the lair of the sleep thieves is difficult. First, go down into the gorge, at the bottom of which there will be a fight with five creatures. Kill them and collect the ingredients for the potion from their bodies. Go to the big door where there will be fewer harpies. Be prepared to use the Aard sign and the silver sword.
When you get to the round altar, watch the cutscene. Sit down and drink some healthy elixirs, save yourself. When you take out the pink crystal, you will be attacked by a dozen harpies. Place protection in time - the “Quen” sign. Then you need to run into any passage and cut out one creature at a time. Local grenades will help a lot. Buy them in the city from merchants.
When you have killed the harpies, go to the altar and insert crystals into it (crystals of different colors should come across along the way. They must be collected). After four dreams, return to Philippa.
Walkthrough of the game Witcher 2 – Where is Triss?

Remember that before Triss was kidnapped, you gave her a rose of memory? She is needed to heal Saskia. When you talk to Philippa, go to the inn. You can learn a lot of information from a local regular and treat him to good beer. It turns out that the bald thug and the girl fell from the sky. The thug left, and the red-haired woman was kidnapped by the troll. Once you find out where the troll is, go talk to him. This is a great guy. He will offer soup to their elves. Tactfully refuse and ask him about the “redhead.” Choose calm remarks, do not contradict him, so as not to lead to a fight. This way you will find out that the troll’s wife was jealous of the “redhead” and left, taking the scarf with her. Triss herself ran away the next night. Go to the troll's wife.
There will also be mercenaries who need to be convinced to spare her. Ask her to go back to hubby. In gratitude, she will give a scarf to the “redhead.” So, return with the handkerchief to Philippa. The conversation with her will be interrupted by the prince's servants. He will say that the peasants believe that Steniss poisoned Saskin. We need to figure it out.
Walkthrough of the game The Witcher 2 – Royal Blood
Go to Prince Steniss's room. He locked himself in the estate, and the men from the city want to kill him. After talking with Dandelion and Zoltan, you will learn about a servant who seems to have heard Stennis and the late priest talking about the deliverance of Saskin. Talk to the servant who lives nearby. The guy is nervous, plus everything, he sits at home when such a quarrel is going on. All this is suspicious. Go to the headman. He will show you on the map where the priest lived. When you examine the room, you will find a drawing of a special. cup with a cavity for poisons. Yes, the priest is to blame, but you can’t ask him anything.
Chat with the prince. Convince the guards that only you can help a high-ranking person. The prince will refuse to give his blood, but will offer a lot of money for an excuse against the crowd. Go outside and pass judgment. The servant will inform you that before serving, the drink is checked for the presence of poison. Tell me about the drawing of the cup. When the prince makes a spectacular performance, you need to remind him of his attempt to bribe you. You have to decide his fate. You can sentence him to death, or let him live until Saskia’s amendment. The best thing to do is soak it and take the blood. Everything indicates that the prince had an agreement with the priest.
The Witcher 2 gameplay continues. To have all the ingredients, you just need to find Triss and the rose of memory. Philippa claims that she is now in the Helselt camp. However, the camp is located on the other side of the ghostly darkness. Only a sick person would dare to pass through it. Naturally you have to go! In this case, Philippa will provide assistance by becoming an eagle owl. When you get to the other side, say goodbye to the girl for a while, go to the king’s camp.
At the beginning of the quest you will see a corpse. Search it and you will find a figurine of some monarch. Move on. When you meet Roche, talk to him and ask for help. Despite the offense, he will tell you about the secret passage into the camp. We must go through the old cave. If Roche doesn’t want to talk, go to the city, where the local “mother” will tell you about the same cave.
Entering the cave is easy, but getting out is difficult. The stone elemental will interfere with you. Use a fast style when fighting. The Yrden sign, which slows down the enemy, is also suitable.
To complete the game The Witcher 2, you need to search the enemy, who will crumble into pebbles. Go outside. Now we need to get to the ambassador. First, stock up on throwing weapons. Approach the healthy wooden gate, ask the guard to take you to the ambassador. He will tie you up and carry you to him. The ambassador will pull out the figurine you found from his pocket, break it and take the inside contents. After talking a little, he will give the order to execute you and leave. When Bianca and Vernon come to help you, take on the sorcerer.
Your fight with Vangemar will cause a lot of noise. Vernon will suggest pretending to catch you. Agree, but first we need to ransack the camp. Here you can profit from good armor. Go to the wooden gate, avoiding the patrols. When the guard asks, answer that you are taking a witcher for interrogation. When you part with your savior, go to Philippa. Tell her about Triss, overcome the darkness and go to the city. It turns out that Philip's maid is a traitor. But in her things you will find a rose of memory that was taken from Triss.
Walkthrough of the game The Witcher 2 – A Matter of Life and Death
Give all the ingredients to Philippa, watch the video where Saskin is healed. When you are alone with her, ask about the commander's sword. You will find out the necessary information, then she will give the blade and thank you for your help.
Eternal fight
To remove the curse, you need to have 4 items that played a significant role in the battle. Echoes of the battle can be observed when passing through the ghostly darkness. Philippa will give advice to talk to the mayor of the city. He will tell you that he personally fought against the Brown Banner, whose banner we should have. When you find out all the details of the battle, go to the crypt in which the soldiers killed in battle were buried. You will find the banner in the sarcophagus. But he is guarded by a ghost. Lie to the ghost that you were in the Brown Banner detachment. He won’t believe it - he’ll have to convince him.
The first statement must be answered with the remark - “Everything was wrong.” The next answer should be the name "Manno Koehoorn". The third answer is “Manno Koehoorn died at Brenna.” The fourth answer is “Zeltkirk and Vandergrift.” Then tell him that you were captivated by the Bigerhorn. If you don't answer correctly, there will be a fight with him. In any case, take the symbol of hatred, go to Philippa.
The Witcher 2 gameplay continues. If you already have Saskia’s sword, then tell the sorceress to go to the battlefield, which is in the ghostly darkness. She will give two other artifacts - a knight's armor and a medallion. When you reach the darkness, possess the Aedirn knight. Your commander will order to capture the enemy's banner. After defeating the standard bearer, transfer to the Kaedweni scout and tell your superiors that the standard has been lost. Jump from cover to cover. After a short cutscene, possess Zeltkirk and move forward, cutting the throats of the warriors that get in your way. When you meet Vandergrift, bring your life bar to the middle and enjoy your victory.
Then Dragoon will appear. We need to persuade Zeltrik to allow us to fight him.
The fight with the huge demon is the most difficult task in this mission. It’s good that all witcher skills are available. You need to use “Quen” and unleash powerful blows on the brute. As soon as he dies, the sorceress will summon a rain of fire onto the battlefield. You, in the role of a priest, will have to lead the fighters out of the field. This way the curse will be lifted.
Walkthrough of the game The Witcher 2 – Siege of Vergan
When you wake up in Philippa's room, tell her about all the events, go to Zoltan. He now leads the army. He will say that enemy troops are coming to the city. You will immediately see the martinets of King Henselt’s army appear on the horizon. First you will be asked to climb the walls to activate the oil supply mechanism. This is how Zoltan wants to fight the first wave of the enemy. Climb up and deal with those who managed to get over, use QTE to start the oil supply.
The first platoon was destroyed. However, the next wave is coming, so the dwarf general will give the order to retreat. When you retreat, climb the wall and talk to Saskia. Listen to the instructions, watch the video. Then you need to place traps near the stairs. It turns out that the opponents who have risen to the top will receive good damage before they can begin the fight. This way you can fight off three waves at once. Then talk again with the “Dragon Slayer”. The girl's scouts are in the mine under the city, but have not returned yet. You will receive orders to go with her into the tunnels to find out what the matter is.
Walkthrough of the game The Witcher 2. Follow the girl, deal with the corpse eaters. You will stumble upon Henselt's detachment, which will be led by Detmold. You can easily defeat ordinary soldiers, but with this sorcerer you will have to work hard. Wait until his life energy is half gone. He then attacks Geralt with a spell to incapacitate him. It is at this point that you learn how interesting Saskia is in her own right.
Talk to her about her secret, return back to Vergen to defend yourself. At the exit you will meet Zoltan. He will say that the remaining army, led by Henselt himself, is rushing towards the city. The people are depressed, but Saskia pulled herself together. She pushes the speech and leads the attack.
First, destroy those who climbed the city walls. Then it will seem to you that there are a great many enemies and you can give up. Suddenly, Iorveth will appear at the head of a detachment of Scoiathael archers. Close the gate to trap the royal soldiers. Zoltan and the leader of the “squirrels” will provide assistance with this. When further progressing through the game The Witcher 2, get down from the wall using the stairs that are located on the right side, if you look at the open gate.
When Henselt finds himself in a disadvantageous situation, he will order his martinets to surrender their weapons. Well, he himself will sign the surrender. This is how victory in the war will be won. But you will notice that Saskia behaved very strangely during the negotiations. Therefore, Iorvet will offer to follow the girl. The girls will leave through the teleport, and you and the elf will go in search of the sorceress’s room. You can find the book "Elixirs and Poisons" in the back room. Show it to Iorveth. If you don't go after Philippa right away, something very bad could happen.
This walkthrough has been translated into Russian and published with permission from the site GRY-OnLine.pl. Full or partial copying of this material is strictly prohibited and is punishable in accordance with the Law of the Russian Federation “On Copyright and Related Rights”. The original English version can be found at Guides.gamepressure.com.
All rights reserved. © GRY-OnLine.pl 2007-2012, © Guides.gamepressure..
Introduction
This is a walkthrough of the game" The Witcher 2: Assassins of Kings Extended Edition"contains a very detailed, richly illustrated description of all the main and side quests in the game. Here you can find a large amount of information that is not in the official walkthrough. Each quest is divided into stages, including all options for passing. There are also comments about the consequences of a particular decision , and detailed maps of the area with important places marked on them.
The guide has been created in a clear and legible format, with easy navigation. Main and side quests with maps are divided into corresponding chapters.
Arthur "Arxel" Yastinski
Translation into English: Jakub "cilgan" Lasota
Translation into Russian: Alexander "Gaara" Zavarzin
Explanation
For example, ( M3, 2) means you need point #2 on map 3.
All comments regarding choices or consequences will be highlighted.
Colors:
Red will be used to refer to NPCs and monsters, blue for locations, green for various items, and orange for quest names.
Long tasks
(quests lasting for several chapters)
Bringing back memory
During your travels, at certain moments your memory will return to you in the form of short animated inserts containing episodes from the past. You will also find various entries that will allow you to talk about your visions and past with some characters. Below is a list of points at which the memory will return.
Prologue

The first memory will come after describing all the events (completing quests) during a conversation with Roche, in the process of the quest" dungeons of La Valette castle ". Geralt will remember the pogrom in Rivia, during which he spoke out against a raging crowd. Unfortunately, he was stabbed with a pitchfork by a peasant named Rob. Beautiful Yennefer died trying to save Geralt .
Chapter 1

The second memory will come back after talking with Ciaran on the prison barge during the quest " assassins of kings ". Geralt will remember his stay with Yennefer on Apple Island which will end with her kidnapping.
In addition, a new dialogue with Buttercup .
Also after this event or finding records you will be able to talk with some characters:
We select records in the destroyed hospital during the quest " in the clutches of madness
"We can talk to Vernon Roche
.
We find the book " Wild Hunt"in the elf bath during the quest" rose of memory"We can talk to Buttercup
.
Death Cedric during the quest" where is Triss?
"We can talk to Vernon Roche
.
Chapter 2

The next vision will visit you after you are captured by Shilard's people (Iorveth's path) during the quest " where is Triss? ", or after talking with the dying assassin (Roche's path) during the quest " assassins of kings ". Geralt will remember several dates and places where the Wild Hunt appeared.
The next memory will appear after you dispel the ghostly haze (the side is not important), after completing the quest " eternal battle ". Geralt remember how he helped Summer when he was wounded by a monster.
In addition, after these events or after finding records, you will be able to talk with some characters:
Let's take the book Song of the Hunt"in the tent during the quest" Where is Triss? "(Iorveth's path), or after completing the quest" blood curse "(Roche's path) – we can talk to Buttercup .
Chapter 3
During this chapter you will not have any memories, but you will be able to talk to The Incredible Lockhart about the sword Addan Date– we can get it during the quest" order for gargoyles ".
Epilogue
The last memory will come up during a conversation with Summer. You will remember that you exchanged your own soul for Yennefer .
Mystic River
Chapter 1
We get the quest by examining corpse of the captain of the Petra Zille
Stage 1: Find the shipwreck site

Near the Kayran's lair you will find shipwreck (impossible not to notice) ( M8, 13). There you will find a corpse and captain's key of the Petra Zille .

This key can open the chest on the opposite side of the ship. Inside you will find diary And report captain.
After reading the records, you will decide that the captain tried to send a report, but, for unknown reasons, never did so. Geralt, being a good Samaritan, decides to find the royal mailbox and send a report.
Step 3: Find a mailbox
The mailbox can be found in two places:
By Ludwig Moers. Description in stage 4, option A.
At the Loredo residence. Description in stage 4, option B.
In the first case, you can immediately go there. In the case of the Loredo residence, things are a little more complicated.
Stage 4, option A: throw the report into the Royal Mail box of Ludwig Moers.

This is the easiest option. Go to Ludwig Mers (M7, 15), and on his desk you will notice a mailbox. You can throw the captain's report into it and try to take out the letter that is already there. Unfortunately, Ludwig will react to this - apply Axiy sign.
Attention! You must complete this stage of the quest before you take sides in the quest" At the Crossroads: Scoia Taeli / Vernon Roche ".
Stage 4, option B: drop the report into the Loredo Royal Mail box.

Dropping a letter in the box at Loredo's residence will not be a problem. Difficulties will arise if you want to get the contents of the box, since it is locked. The key can only be obtained by killing Loredo during the quest" Death to the traitor! ".
Attention! The chance to gain access to Loredo's box will only appear twice: during the course of the quest " Indecent proposal ", and later, after choosing a side Roche in the quest" Death to the traitor! ".
Step 5: After leaving Flotsam, find the second shipwreck
After reading the letter from the box, you decide that you need to find the crash site of the second ship.
Chapter 2

Following the notes obtained in the first chapter, you will find the location of the second shipwreck in Pontara Valley . Find it there box, in which lies diary from the ship "Eila Tarn" . From it you will learn about the treasures hidden under Lok Muinne .
Attention! Try not to use materials, found in the chest, as they will be useful for creating Vranov armor .
How to find the ship - Iorveth side
Go beyond Vergena and head towards the gorge where you will meet a troll ( M13, 10). Continue south and turn right at the intersection. There you will find shipwreck (M13, 12).
How to find the ship - Roche's side
After you dispel the darkness, during the quest " Siege of Vergen ", you will pass nearby shipwrecks (M23, 15).
Chapter 3
Exploring Lok Muinne, you will find sewer entrance (M31, 16). Inside you will find a chest ( M33, 3). Open it up key, taken from the captain's body in the first chapter.
Stage 5: find a magician - a blacksmith who will make the Vranov armor.

The only blacksmith in the area who knows magic is Bras of Ban Arda . You can find it on the main square ( M31, 20). This will end the quest.
Attention! To create the armor, you will need two important parts, which can be found in chests throughout this quest, in the second and third chapters: reinforcement of the corvid shell (chapter 2) and armor from Iisgit (Chapter 3).
Attention! Strengthening the Corvids' Shell can be purchased from Brasa of Ban Arda (M31, 20).
Old scores
Chapter 2
Iorveth's side
Fisticuffs: Vergen "will come to you Zilgard
Rocher side
Once you win three battles in the quest " Against blue stripes "will come to you Barton and challenge. You can refuse the duel or accept the challenge and defeat him - in these two cases the knight will promise that you will meet again. This will happen in the third chapter.
Chapter 3
Iorveth's side
We receive the quest from Zilgart (M31, 12).
Stage 1: defeat Zilgart
If you chose Iorveth's side and in the quest " Fisticuffs: Vergen Zilgart Lok Muinne (M31, 12
Reward: 250 XP
Rocher side
We receive the quest from Barton (M31, 31).
Stage 1: defeat Barton

If you chose Roche's side and in the quest " Against blue stripes "won or refused to fight with Barton, you will meet him in one of the buildings in Lok Muinne (M31, 31) – he will automatically challenge you to a fight. Defeating him won't be any problem if you press the right buttons and don't make mistakes.
Reward: 250 XP
Memory of old years
Chapter 2
Iorveth's side

Get to huts over a cliff (M13, 15) you can after you reach the Kaedweni camp by going through the curtain. On the left side of the house you will see several barrels - destroy them Aard or Igni, thereby clearing the entrance to the basement.

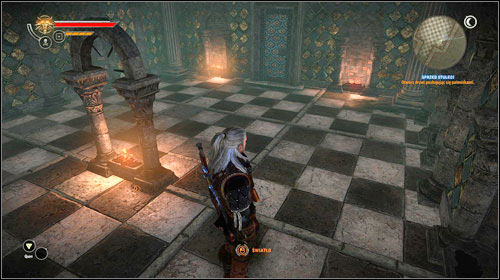
Inside you will find three altars with candles. You must light them in the correct sequence, otherwise you will be attacked ghost. Each of the altars has symbols resembling arrows (pointing down, up or connected).
Attention! You can find out the correct order by examining several graves located near the house ( stage 3, option B).
The correct order is (example in the screenshot above):
Candle on the left (down arrow)
Candle on the right (arrows connected)
Candle in the middle (up arrow)

The door will open to a secret room in which you will find Malget's notes . You will be able to decipher them only in the third chapter.
Rocher side
Notes from Malget you can pick up as you progress through the quest" little sisters ". You can also go straight to the house, following the instructions above. You can decipher the notes Detmold (M25, 7) - we can sell them to him or keep them for ourselves, however, without them we will not be able to complete this quest in the third chapter.
Chapter 3
Step 1: Learn more about Malget's notes

You can find out more about the records by interviewing the right person on the square. If you are on a quest" In the name of a great goal! "decide to make your way through the sewer ( M31, 16), Guardian will speak to you as soon as you enter. Unfortunately, you won't understand anything.
On Roche's side, you will end up in the sewer during the quest " for Temeria!", if you decide to save Triss.

For transcription of recordings, you should contact Brasu of Ban Arda , which is located on the main square ( M31, 20). After examining them, he will tell you that with their help you can get into the secret vault. However, first we should talk to the guard - we can find out how to do this by paying or using Axiy sign. You will find out the password: " Nanna Kanpa Zi Uddu-ya Ia Ia Gat Exa Nanna Zi Uddu-Zi Gat Kanpa Nibbit". First you should read everything that comes after "Nanna Kanpa", skip "Nanna Zi", and read the rest in reverse order.
Step 2: Give the guard the correct password
Go to sewerage (M31, 16), find Guard (M33, 2), tell him the password and go through the portal that opens. In the correct order it sounds like this: " Zi Uddu-ya Ia Ia Gat Exa Nibbit Kanpa Gat Uddu-zi".
Stage 3: open the door using fireplaces

A small puzzle in which you need to light all the fires. Each one affects the other two (according to the numbers in the screenshot):
1 : 2 and 4
2 : 5 and 7
3 : 1 and 2
4 : 3 and 6
5 : 1 and 7
6 : 3 and 5
7 : 3 and 6
Initially, the fires numbered 1, 4 and 5 are lit. To light them all, light them in order 1 6 2 1 . The door will open, go through it to the magician. There are two options for completing this quest:
You can ask him to reset all your skills - in this case you can redistribute them.
You can kill the magician.
Stage 4: Defeat the Guardian

Fighting a mage can be challenging even on the lowest difficulty level. Manager can only be wounded with a steel sword, however, it also summons gargoyles(always two at a time), which should be killed with a silver sword. if you have Heliotrope sign, this is a great opportunity to take advantage of it, otherwise it will be a little more difficult. When gargoyles appear, the magician becomes invulnerable. The Guardian can use powerful spells that will immediately remove the effect Sign Quen. After killing him, be sure to search the body before going through the portal - you will find Operator's staff .
Attention! If you pay off everything torches on columns, the magician will not be able to summon gargoyles.
Despite the fact that Geralt, during the siege and capture of the La Valette castle, acted as Foltest's personal bodyguard, he is accused of the latter's murder and is hidden in the dungeon of the aforementioned castle. Geralt is brought to Vernon Roche for questioning.

He himself was in the thick of these events, but at some point, he was isolated from the king and Geralt. Roche, still the commander of the blue stripes, a kind of special forces in the Temerian army. Vernon Roche is interested in the events that took place from the witcher's point of view. (Answer options will appear.) In order not to get confused in the chronology of the game, it is better to answer them in order.

The game developers assured us that they would transfer data from the first part of the game, and yet... Although in the first part of the game there may be two options for parting with Triss Merigold, here we wake up in her arms. The intimate setting is interrupted by King Foltest's messenger. Geralt urgently needs to appear at the position where the king is waiting for him. While Geralt is getting dressed, in a conversation with Triss he clarifies a couple of pressing issues. This is how he learns that the killer who attacked King Foltest a month earlier is also a witcher. Later, in a conversation with Foltest, when asked what the witcher found out about this, there is no need to hide it. If you admit that it was a witcher, then you will earn even more trust from Foltest. Then he follows the military camp to the king.

Following through the camp, Geralt meets people who remember him, but Geralt himself does not remember anything, what they are trying to talk to him about. These are the consequences of meeting the “Wild Hunt”. But we know about this from the first part of the game. In the group of people (these are rubiles, but Geralt doesn’t remember them) who are preparing to take part in the assault on the fortress, there is one individual who, contrary to common sense, does not want to put on armor. His name is Small. He asks Geralt to make sure his decision is correct. Referring to the power of the magical amulet he has. Geralt needs to look at him.
- You can indicate that the amulet is cursed, then Small will give the amulet to Geralt, and he will put on the armor. Later he will thank Geralt for staying alive.
- It can be pointed out that the amulet is truly magical, but it is not known what kind of magic. The little one will put on the armor, but will not give up the amulet. Later he will thank Geralt and give him a present.
- You can just let Petty go as he wants, i.e. without reservation. Later, collect the amulet from his corpse. The quest with this amulet will continue in the next chapter.

We find the king next to the ballistas. The King introduces the Witcher to Shilard Fitz-Oesterlen, the Nilfgaardian ambassador. After talking with Foltest, Geralt learns that they are going into battle. Foltest and Geralt enter the siege engine and begin moving towards the castle walls. Foltest explains to Geralt that he must pick up his young children, who, at the instigation of his enemies, are hidden from him by his mistress and mistress of this castle, Marie-Louise La Valette.

Temerian soldiers, led by their king, begin battle with the defenders of the castle. Without meeting much resistance, the troops move forward, but there is a barricade in front of them. The barricade can be demolished with the help of a ballista located in the courtyard. Geralt must go down and use the ballista.

Down there, besides the ballista, there will be about a dozen castle defenders, but nothing complicated. We deal with the castle defenders and prepare the ballista. A new wave of defenders. We aim the ballista. Another wave of defenders. Now we tear down the barricade. Then we join Foltest and the rest of the attackers.

There is another obstacle ahead, a gate that is protected by a dozen crossbowmen, led by their leader Ariane La Valette, who took refuge on the tower; they have a good position from above and it is not so easy to approach them. Arian responds negatively to all of Foltest's offers to surrender. The Witcher will have to deal with this.

Under the cover of Foltest's archers, Geralt climbs under the walls of the tower and climbs to the top. When we are at the top, we have three options for resolving the problem:
- First - Kill everyone and everyone. For the Witcher, a dozen soldiers are not a problem.
- Second - Challenge Aryan to a duel and kill him.
- Third - (In my opinion, the most preferable.) Convince to surrender. Many will remain alive, including Arian himself.

King Foltest, Geralt, Tris and Vernon Roche approach La Valette's castle, suddenly a dragon appears. And he starts to attack. According to the developers, he is invulnerable (for now), so we cannot fight with him, but only run away. We run to the castle gates, taking cover under some plank structures. But under them we meet the defenders of the castle, and we also have to get rid of them. The first lattice gate, Tris blows up. They follow further.

After another dragon attack, the walls and ceiling of the tower through which they pass begin to collapse. Tris creates a protective dome, but at the same time she cannot follow with the others. Approaching the gates of the monastery, they are faced with another obstacle: another huge wooden gate, which is very problematic to cut through. The king gives Geralt the task to find a workaround and open the gate.

Geralt goes downstairs into residential areas. In search of a passage to the monastery, Geralt helps Foltest's soldiers get rid of the La Valette knights. To do this, you don’t need to immediately go looking for a passage, just wander around the block. All houses are open, you can enter and explore them. During this exploration, Geralt is able to prevent the atrocities of marauding soldiers. Subsequently, if Geralt saved local residents from murder, he can meet them in Flotsam, where he will end up after escaping from prison. Those saved will thank the witcher.

It is simply impossible not to notice the passage where you need to go; it will be highlighted on the compass. There, having found a well, we go down and find ourselves in dilapidated casemates, where the drowners are in charge. We follow the corridors through gates that can be opened. It's very difficult to get lost. Having reached the surface, we find ourselves not far from the monastery cemetery. On the bank of the river we see skoy'taels and a boat. They are inaccessible to us.

We go to the monastery. On the way we will meet a couple of defenders. In the interior spaces and courtyard we will once again meet resistance. At one of the defenders of the courtyard we find the key to the room with a winch that raises the gate. We take the key and raise the gate. The king and his men enter the monastery.

Having elicited the necessary information from the inhabitants of the monastery, the trio (King Foltest, Geralt and Vernon Roche) set off further. Foltest wants to take his children, who are hidden in the tower. King Foltest, Geralt and Vernon Roche are three walking across a bridge when a dragon swoops down on them. The fiery attack scattered their group. Geralt and the king run away from the dragon together. They reach their goal and take cover behind the walls of the tower. Geralt rushes at the dragon who is trying to stick his head through the gate of the tower. He plunges his sword into the dragon's mouth and breaks up with him. The monster flies away with him, trying to pick the sword out of its mouth.

Foltest finally meets his children. A blind priest standing nearby pushes the children into their father's arms. Foltest asks Geralt to leave him with the children and let him talk to them. Geralt goes to the window and looks at the scenery. The king asks the eldest of the children, Anais, to help wash his tear-stained little brother Busi.

Left alone with the priest. And the “blind priest,” who is not a priest at all and not even blind at all, deals a mortal blow to the king. Geralt simply didn’t have time to help. The killer jumped out the window, and there, down on the waves, those same Scoia "taels" were waiting for him in the boat.

It is clear that the king’s guards, who rushed in at the noise, seeing the witcher with a drawn blade standing over the dead king, considered him the killer. So Geralt finds himself in the dungeon of the La Valette castle, where the prison is located. Vernon Roche, devoted to the king to the core, believes the witcher. He takes out from the safe a file on the witcher from five years ago, which states that the witcher was killed during a massacre in the city of Rivia, and the sorceress Yennefer, who tried to save the witcher, also died. Then, under strange circumstances, they are both taken away by an ashen-haired girl. Some of Geralt's memories return. Next, we answer Roche’s questions that we will look for and pursue the killer if we manage to avoid the gallows. (You don’t even have to try other options; they will be followed by a reboot of the game.) Roche cannot simply let go of the witcher. He leaves Geralt the key to the shackles and hints that at dawn, he and his ship will set sail on business.

Geralt is returned to his cell. Here we free ourselves from the shackles and begin our way to the exit, while blowing out the brains of the jailers. Don’t forget to check their pockets; there may be keys to the next doors.

If you acted wisely and left Ariana La Valette alive, then we will meet him either in one of the corridors or in the torture chamber, depending on how you go, up or down. Aryan is beaten and very weak, he will ask you to help him get to the oil storage facility. There he will open a secret passage and we can go free. At the same time, he himself will remain in the dungeons and start a fire.

The second option for release is if for some reason you still killed Aryan. Have you become cowardly or have you become overwhelmed by pride, like some brat is objecting to the witcher... Now, on the way out, we will meet Ariana’s mother, Marie-Louise La Valette. We meet her alone and free her and then we meet the Nilfgaardian ambassador Shilard, or we immediately meet her in the company of the Nilfgaardian ambassador Shilard, it depends on how you go, up or down. In both cases, Louise convinces Shilyard to help the witcher.

We leave the dungeon, meet Small (the one who had the amulet) or stumble upon his corpse, depending on what you advised him. If he still survives, we ask him to distract the guards and proceed to the ship. Triss Merigold and Vernon Roche are already waiting for us there. Having compared all the known facts, we set off for Flotsam. (A new chapter begins.)

P.S. If we look at the book, we see a discrepancy from the very beginning. King Foltest dispersed all the sorcerers six months before his death, so the very presence of Triss Merigold is already a strange phenomenon. Book Geralt was also far from Foltest at this time, healing his wounds.
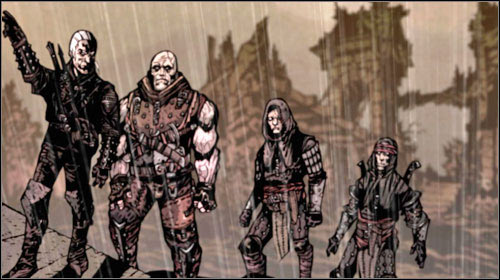
If you chose the side of Iorveth and the Scoia'tael, then you will begin the chapter playing as Stennis, Prince of Aedirn. You are sent to a meeting between King Henselt and the Aedirn nobles who want to sell the country. The King of Kaedwen and his troops will publicly attack you and your allies. As was the case when you played Iorveth, Stennis has at his disposal all of Geralt's combat skills, except for magic signs. Concentrate your attack on the king while Saskia and the others deal with the troops and magicians.
Now you play as the Witcher again. You are surrounded by ghosts and draugs. Let Iorveth deal with smaller enemies, and you take on a large enemy with a shield. For protection, use Quen to keep him at a distance - Aard. If you have leveled up your Mill and Reflect Pain skills, then this battle will not be difficult.
Now Philippa will lead you across the cursed field, surrounding you and your allies with a magical shield and shooting off most (if not all) enemies with lightning. Sometimes spirits and draugs will get in your way. In this situation, it is worth quickly and effectively dealing with the spirits that support the spell while your allies fight the draugr.
Soon you will reach Vergen, where Skalen Burdon will guide you. Follow him to the tavern, where he will show you to your room. After which you can go to the military council to hear about Saskia’s plans. Ultimately, the resistance leader will drink from the poisoned chalice, and you will need to look for an antidote.
Immortelle
The first ingredient in the antidote is immortelle, which grows deep in the mines of Vergen. Go to the tavern and talk to the dwarves Zoltan and Yarpen. They will want to help you find a cure and will take you to the entrance to the mines. Before you go, stock up on the Cat and Swallow elixirs.
There is almost total darkness in the mines, so the Cat’s elixir will make things much easier for you. There will also be gnomes with you, which will make the battle much easier. You will mainly fight regular and large corpse eaters. Keep in mind that they explode before they die, so quickly roll out of the way after killing each one.
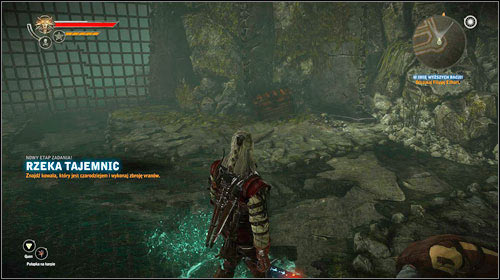
First, go to the pen to the west (according to the map) of the mine, where you will find the corpse of a miner. Search the corpse and you will find the key to the upper shafts. With this key, go to the northeastern part of the mines. Proceed to the dead end to the north and you will find another corpse and a key to the middle mines.
Use this key to open the door in the center of the map. Here you will find a good weapon and a third corpse with a key to the lower mines. Exit the room and follow the corridor a little to the west. This passage leads to the southeast, where the immortelle grows.
The grass is under serious protection of the duckbill and a pack of carrion eaters. Your allies will serve as a good distraction for the creatures. You, under the influence of Quen, will have to stun, lure into traps and in every possible way beat a healthy duckling. Yrden will help you keep it under control. You can also use bombs to kill the corpse eaters around the duckbill and thereby damage it with explosions, both from the dying corpse eaters and from bombs.
When the enemies are finished, take the immortelle and other treasures. Like, for example, the recipe for a silver sword made from a red meteorite. When you're ready, get out of the mines, simultaneously killing any enemies that might reappear.
Harpy Nest
If you bring the immortelle to Philippa, she will help you find the next ingredient. Find Cecil Bourdon and ask him where to find the magic stone. He will offer to go to the tower, which is located in the forest.
Before you set off, upgrade your weapons from merchants. If you find drawings of a silver sword from a red meteorite in the mines, be sure to use the services of a blacksmith. Go to Vergen's back gate. You will be attacked by 4 Scoia'tael.
It turns out that not all of Iorveth's followers are loyal. Kill the archers first, then the dual-wielding enemy, and finally the axe-wielding dwarf. As long as you use Quen, you will be safe.
Now go along the shallow part of the river and to the right up the hill. If you are attacked by harpies or soldiers, be sure to deal with them, otherwise during the battle you will not be able to jump over the cliff. Jumping from one hill to another, you will eventually reach the tower that Cecil spoke about.
You will be attacked by a flock of harpies led by the Keleno harpy. Use Aard to disperse the group and defend with Quen. Deal with the small harpies first, and then with their leader. After the battle, take the stone from the tower and head back to Vergen.
Talk to Philippa and Cecil, and you will learn that the stone you found is not powerful enough, and you will need to go to the harpy nest. Persuade Cecil to give you the key and move out.
As the name suggests, the Harpy Den is infested with these creatures. Make sure that all your items, elixirs and traps are suitable for fighting these enemies. Because they fly, harpies are virtually immune to certain types of conventional tactics.
In the lair you will find several crystallized dreams, one of which turns out to be a dragon's dream. There will also be dreams of Iorveth and the peasant. Be sure to search the dead soldier inside. You will find excellent Kaedweni armor from him, which will be useful for the next battle.
At the end of the lair you will find a projector that contains Summer's dream. Drink elixirs and set traps before taking the dream. Because then you will be attacked by an army of keleno and the harpy queen, for a total of 8 enemies.
The traps that you set before the battle will help you weaken the flock. Use Aard to control enemies and Quen with Reflect Pain. Due to the limited space in the lair, you will have to run around the column in the center and lead the harpies behind you. This will also give you time to regain your energy and health. As with most boss fights, deal with the smaller enemies first and then the queen.
When the harpies are dealt with, play the crystallized dreams in the projector to find the dragon's dream. Then head back to Vergen and talk to Philippa.
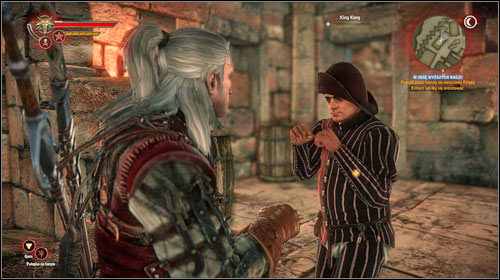
Trolls and mercenaries
Go to the tavern and talk to the drunken gnome at the bar. He has information about Triss's whereabouts, but he will only share it if you buy him a beer. Give him about 20 orens, and he will tell you where your girlfriend is. This will take you to the gorges not far from Vergen.
At the familiar intersection with the altar, turn right. Here you will meet the troll who courted Triss. You will have the choice to kill him, but it is much more useful to talk to him and agree to help get his wife back. After talking with the monster, go further into the gorges, and eventually you will find the troll's wife, who was attacked by Pangratt and his mercenaries.
You can make a deal with people and kill her, or keep your word and help her. In any case, you will have to fight, and there will be one or more allies on your side. As before, use Quen, let your allies take the main blow, and you, with rolls and quick strikes, deal with the enemies one by one.
Whether you killed the troll or Pangratt escaped, you must return to your husband and report what happened. If you killed his wife, he will attack you. His fighting style will be no different from his wife's. However, if you helped them reunite, they will give you Triss' Ribbon and become Vergen's allies.
Peasant revolt
Upon returning to Philippa with Triss's ribbon, we learn that the peasants are indignant and want to kill Prince Stennis. The sorceress will remind you that to cure Saskia you need royal blood... the blood of Stennis or Henselt.
Go to the prince's chambers, where you can listen to the opinions of nobles, commoners, soldiers, as well as the prince himself. You will only be able to interview 5 people before you are asked to make a judgment.
The prince himself will not tell you much, nor will the peasants who want to deal with him by lynching. However, you can find out a lot of interesting things by talking with the blacksmith who made Saskia's cup and the servant who poured the wine. But in any case, the evidence found is not enough to name the culprit.
You can choose between lynching and a fair trial of Stennis. In the first case, you will be able to get the royal rabbit, in the second case, you will have to take blood from the Kaedweni king. Although this quest is not resolved in any way in the second chapter, in the third you can find out that he is in fact guilty.
Kaedwen and Nilfgaard
You'll have to travel to the other side of the cursed battlefield to find Triss and maybe even get royal blood. First talk to Philippa and she will agree to guide you through the fog. Exit Vergen, follow the road down and to the right, into the ghostly fog.
As at the beginning of the chapter, you will need to be within the magic field. Also, since Iorveth is no longer with you, you yourself will have to protect Philippa. As before, when the sorceress's spell is interrupted, quickly deal with the ghosts with powerful blows, rolling from one to another. You don't have to worry about the drag.
Eventually you will find yourself on the other side of the fog. After a short conversation with Roche, you will learn that there are two ways to get into the Nilfgaardian camp: sneak through the Kaedweni camp or bribe the courtesans on the hill.
Bribery requires a considerable amount of orens, so it is recommended to save money and choose the second option. Travel to the shores in the northeast (on the map) and infiltrate the Kaedweni camp.
You will need to move very carefully, because if you are noticed, then after a while the game will automatically end with your death. First, wait for a group of drunken soldiers to come out of the bar. Run behind the tents and move on. A patrol will leave the gate and head towards the center of the camp. When they stop, take out the lone soldier at the armory and continue west, hiding behind the tents.
Now wait until the guard relieves himself and returns to the fire in the center of the camp. Continue moving forward, the cook will notice you. Quickly run up to him and use the Axii sign on him to convince him that he needs to rest and go to bed. Go right. A patrol will come out of the gate. Wait for the soldiers to leave and use the same door. Knock out the soldier on the cliff and go down. Walk along the beach and enter the caves.
Several corpse eaters await you here - nothing dangerous or new after your adventures in the mines. Move through the caves, and when you reach the Nilfgaardian camp, guards will catch you and take you to Shilyard. After the conversation and cutscenes, Roche and Bianca will join you to deal with the remaining enemies.
While your allies are taking the brunt of the attack, use Quen and concentrate on the wizard. Dodge his fire magic, and when he uses protection, switch to weaker enemies. As soon as the magician's defense subsides, use Aard and hit him as hard as you can.
When the wizard is dealt with, Roche will help you make your way through the Kaedweni camp. If you let Stennis die, you will have to play along that you are a prisoner and answer the questions of the guard at the gate. In the first case, select “Game”, in the second – “Silence”.
If you didn't let Stennis die, you'll have to sneak into Henselt's tent. Hide behind the crates and wait for the soldiers to leave. Here, without leaving behind the boxes, move to the right along the cliff and behind a large tent with two guards. Use Aard on the barrels, the guards will go see what happened. Go around the tent in a clockwise direction and go inside.
Eventually you will find yourself outside the camp. Meet with Philippa and travel back to Vergen to heal Saskia.
Symbol of Death
Now that Saskia is alive and well again, you need to put an end to the curse on the battlefield. You need to obtain certain relics to put an end to the Eternal Battle. After talking with Sasky and Philippa, you will receive 3 necessary items: Vandergrift's sword, Zeltkirk's armor and a magic medallion. The last part of the puzzle is the Brown Banner banner in the forest in the catacombs.
Use the upper (on the map) exit from Vergen, cross the familiar lake, pass by the familiar hills and enter the catacombs. Go downstairs. Many walls can be broken with Aard, but there is almost nothing of value there.
You need to go down to the lowest level of the crypt. Kill ghosts on your way. And in the end you will meet the ghost of Eckhart. You can talk to him and convince him that you are right by answering a few questions. First answer that he is wrong, then - Menno Koehoorn, then - Menno was killed near Brenna. The commanders of the armies are Vandergrift and Seltkirk. And finally, that Biggerhorn took you prisoner.
If you make a mistake when answering or don’t want to talk at all, then you will have to kill the ghost. The Yrden sign helps well against him, which will allow you to go behind your back and deliver powerful blows. Also don't forget about Quen and rolls. If you have pumped up your Power and have a strong sword, then you will quickly cope with it. In any case, take the banner from the coffin and return back to Vergen.
If you haven't received the other three relics, talk to Saskia again. Then talk to Philippa one last time to head to the cursed battle.
Eternal fight
You will be possessed by various spirits, during which you will be deprived of witcher abilities such as magic and elixirs. First, an Aedirn soldier will take possession of you. While your allies are fighting the Kaedweni soldiers, concentrate on the standard bearer. Parry and strike quickly and you will defeat him.
Now you will be captured by a Kaedweni soldier, who needs to run to the commander and report what happened. However, your allies do not know that you are coming and will not stop shooting arrows. Use the barriers to take cover from the volley of fire arrows and quickly run to another cover when the archers are reloading. As a result, you will reach Vandergrift with a report.
Then Zeltkirk will take possession of you. There will be many enemies, but, as in any battle not for the witcher, the tactics are the same: parry and counterattack with quick blows. Eventually, you will meet the draugr and will be able to play as Geralt again. Kill the standard bearer and get ready for a boss fight.
Sabrina will rain fireballs onto the battlefield, and arrows and volleys of trebuchets will rain down from Vandergrift. Quen will be enough to block many of these attacks. In a defensive position, Vandergrift will often counterattack, so it's best to just wait out this moment before attacking.
With a fully upgraded Quen and a lot of energy, you will be able to avoid up to 15 attacks in a row. This is very convenient, since every blow from Vandergrift can be fatal. First, focus on breaking Draug's shield with relentless attacks. If you run out of energy, hide behind the rubble and wait for one or two bars to be restored. Use Quen and attack Vandergrift again. Use a combo of three quick hits. Then run away again to regain energy.
It will take a lot of time until you deal with Vandergrift, but the tactics described above are very simple and safe. After the battle, you will play as one last spirit - a Kaedweni priest. Avoid Sabrina's fireballs and emerge from the fog to end the curse.
Siege of Vergen
Now that the curse is over, Henselt will attack Vergen. His troops will attack from the main gate first, but Zoltan has an idea on how to stop the first wave. Use Quen and go up the stairs on the right. There is a lever here that, when turned, will pour boiling oil onto the main entrance. As long as you have Quen, enemies will not be able to interrupt the interactive scene.
After a few cutscenes, you will find yourself on the wall of Vergen with Saskia, Zoltan and a crowd of allied soldiers. The Kaedweni troops will set up ladders and their soldiers will begin to scale the wall. Allied troops will damage them with arrows, but when it comes to hand-to-hand combat, everything will depend on you.
Thanks to the huge number of allied troops, we will not have to resort to sophisticated strategies. Enemies will often be distracted, and you will be able to strike from behind and use Igni and Aard. In fact, you will be able to deal 6 or more hits to the enemy before they switch to you. By that time, however, the enemy may already be dead and will not be able to fight back.
After two waves of attack on the wall, Saskia will ask you to go with her to the mines. She will guide you, so just follow her. Kaedweni troops have already penetrated the mines, and you will have to clear several rooms of enemies. They fall easily from Aard and should die from a couple of heavy blows from the sword.
In a large hall in the mines we meet Detmold and another crowd of soldiers. Use Quen and let Saskia take the main attack. If you're lucky, she'll push them to the edge of the room, giving you time to deal with them one by one. Although Dethmold is a big threat in this fight, it is not necessary to kill him. It will be much more practical to dodge his spells and concentrate on his henchmen. When only two enemies remain, a cutscene will begin and the battle will end.
You'll return to the wall and fight another wave of soldiers. The strategy is the same. There are many allies, so there will be no difficulties with enemies. After you deal with the first wave, follow Zoltan and meet with Iorvet. Cover Zoltan, and he will break the gate mechanism. War is over.
After the heroes negotiate the terms of the peace treaty, explore Philippa's room and talk to Iorveth to end the chapter.
Where is Triss?
If you decide that Triss is more important to you, take Fitz-Esterlen hostage and go with him along the secret passage, the path to which the ambassador will show you. Get out, you get out, but bad luck - the passage, it turns out, was under the Nilfgard camp, the settlers of which have rather hostile feelings towards the “White Wolf”. Having killed the ambassador and placed a huge reward on your head, the head of the “Blacks” will leave, leaving you to be torn to pieces by his dogs. The “Quen” sign looks most advantageous in such a situation, because if opponents surround Geralt, they will chop him down in a matter of seconds, and of course we don’t need this. Having dealt with the Nilfgard bastards, we approach the door and find that it is locked. We'll have to take a detour. Not far from the battle site there is a ladder that you can use to climb the walls of the camp. Along the way we'll have to deal with a couple more of the emperor's soldiers, but these battles are nothing compared to what awaits us ahead.
Once you reach the hill, prepare to fight over twenty soldiers. And if at first they will only tease you with rare groups of three opponents, then after a few seconds they will dump out a dozen enemies at once. When the area is empty, we climb up that same hill and continue our way to the dungeons. After talking with Renuald aep Matsen, we are preparing for the next influx of Nilfgardians. Having dealt with them and having heard compliments from Matsen, we enter into a 1 on 1 battle with the commander. Renuald, in fact, is a very weak fighter and can only take on a colossal supply of vital energy. After the enemy screams “For the Emperor” and collapses dead to the ground, we remove all the keys from his corpse and go down to Triss’s dungeon. A serious conversation with your girlfriend awaits you. Having finished chatting, we take Miss Merigold out of the Nilfgard camp.
Meeting of sorcerers.
Having got out of the Nilfgard camp, Triss will offer to split up, which we actually agree to (there is no choice). Having purchased a new weapon from a local blacksmith and brewed a couple of elixirs, we set off to the meeting place, where the charming Triss Merigold is waiting for us. After killing the two soldiers guarding the entrance, we make our way inside and watch the video. Sheala is sentenced to death for killing the kings, but before putting shackles on her hands, she calls for help from her pet dragon, who immediately carries her away from the battlefield, abundantly pouring fire on the entire surrounding area. Everyone except Geralt is trapped, and we need to deal with the sorceress, because otherwise Saskia in dragon form will deal with us.
And the dragon came.
We go up the slope and run into the tower. You should walk along the steps carefully, as they can collapse at any moment. Moreover, we will constantly be bothered by the dragon, who will fry Geralt if we hesitate a little. Having reached the top of the structure, watch the video and activate the crystal before the sorceress is torn into pieces. In gratitude for the rescue, she will tell us that she was not involved in any murder except for King Dimovend, and all these atrocities lie solely on the shoulders of the “snake” witcher. Having said goodbye to Sheala, we prepare for the battle with the dragoness.
Even though she looks menacing, she actually doesn’t do much damage, and with proper use of the Quen sign, she can be defeated without much harm to health. When the health of a representative of the ancient race drops to a critical level, a QTE scene will start in which you need to quickly press the left mouse button and as a result, Saskia in the guise of a dragon will fall into a tree, piercing herself through. If you saved Triss and not Philippa, then you can safely leave; you won’t help her anymore.
Chapter 3 (Roche's Path).
In the name of Temeria!
Having decided the fate of the king, we set off for Loc Muinn, where Leto, Saskia, Philippa and, of course, Sheala had already visited before us. After watching the video, we follow Vernon, who leads us into the city. Having cut the heads of a couple of harpies and reached the walls of the city, we will meet a detachment of the Order of the Flaming Rose, among whom will be our old comrade (if, of course, you did not betray him in the first part) Siegfried. If you have friendly relations with the order, there should be no problems. It will be a little more difficult for those who in the original decided to go over to the side of the Scoia’tael; however, after chatting a little with the knights, Roche will convince them of our innocence.
After passing through the gate, talk to Siegfried while the captain of the blue stripes goes about his business. An old friend will tell you about what happened to him over the past few months, and also tell about the reasons for his appearance in Loc Muinne. Having talked enough with the new master of the order, we go to the Redan camp for Roche. After wandering the streets a little and purchasing the necessary things from merchants, visit King Radovid. Geralt once helped out the king and, as a sign of gratitude, he will not hand over the witcher to the authorities, but will demand that he be given one more favor. The monarch found out about a certain plan to divide Redania between him and King Henselt, and therefore he urgently needs to place Princess Anais on the throne. The whole problem is that the girl was kidnapped by the sorcerer Detmold. As a reward for saving the princess, he promises to help Sheala and me.
Going on this task alone is a rather stupid idea, and therefore Vernon gladly volunteered to help us.
Flesh of the flesh.
The sorcerer is holding a girl in a camp where we will have to make our way through the sewers. Along the way we will meet Roche and, in the company of a “faithful shoulder,” we set off to storm the Kaedweni camp. Having got out into the fresh air, we kill the guards at the gate and discuss with Roche a plan for further action. Vernon went to look for the mechanism that opens the gate while Geralt had to fight off the advancing waves of Kaedweni. Try not to forget about magic signs, even if you haven’t leveled them up at all. So, for example, “Aard” will help take a couple of soldiers out of the battle for a few seconds, and “Quen” will reduce the damage done to you. When Roche unlocks the gate, we make our way deeper into the camp, simultaneously destroying small detachments of Kaedwen soldiers.
Ultimately, we will end up in battle with the sorcerer himself. It will be quite difficult to defeat him, since in case of any danger he will teleport to some distance from you. Knock him down with the Aard sign and hit him a few times. Having repeated this algorithm a couple of times, and having watched the scene with the cowardly flight of Detmold, we head to the tower where the princess Anais we need is being kept. True, the doors to her dungeon are locked with some special charms, and while Detmold lives, the dungeon will not open. Well. We will solve this problem. Having gone upstairs, we watch the video. Roche has quenched his thirst for revenge, and now we have access to the door to the princess’s dungeon.
At the exit from the tower, knights of the Order of the Flaming Rose will be waiting for us, who demand that the princess be given to them. We refuse, and if your relationship with Siegfried is friendly, he will allow us to leave. If not, you will have to fight. In any case, having dealt with Siegfried and his company, we return to Radovid or agree with Roche and hand over the girl to Emperor Timeria.
Meeting of sorcerers.
It's time to visit the amphitheater where negotiations are currently taking place between the rulers of countries and their advisers. If you did not give Anais to Timeria, then she will be waiting for you at the gate. Inside there is a heated, political conversation, which is interrupted by our three heroes. By giving the princess into the hands of the king of Redania, we thereby give him the opportunity to continue to calmly rule his country. The next point of debate will be the decision to form a new sorcerer’s council, which will include the hated Sheala. True, the sorceress’s fiery speech will be interrupted by the knights of the Order of the Flaming Rose, who will bring the killer of kings into the hall. Leto will report that he acted under the influence of Sheala and, believing him, the king will order the sorceress to be handcuffed until the circumstances are clarified. This is where Sheala’s pet dragon appears on the scene. Having dragged her into the tower, he will begin to mercilessly burn the entire surrounding area.
The appearance of the dragon.
Our allies are cut off from us by flames, so we will have to deal with the dragon one on one. We climb the stairs into the tower, occasionally shortening ourselves from the tenacious, clawed paws of the dragon. Having reached Sheala de Tanserville’s room, we watch as the woman tries to hide. Fortunately, someone replaced one of the teleportation stones and if the “magician” does not pull it out, it will be torn into pieces. Having dealt with the stone, we enter into a conversation with Sheala. She admits that she really was behind the murder of King Dimovend, but she has nothing to do with the death of Foltest and the attempt on Henselt’s life. Apparently Leto, having tasted royal blood, decided to become an errand killer, and the Nilfgard empire financed him. When the sorceress teleports to meet us, a dragon will appear.
Even though he looks menacing, he actually doesn’t do much damage, and with proper use of the “Quen” sign, she can be defeated without much harm to health. When the health of a representative of an ancient race drops to a critical level, a QTE scene will start in which you need to quickly press the left mouse button. As a result, the dragon will collapse to the ground, painfully hitting a tree sticking out of the ground. Here it turns out that the dragon is actually Saskia, who is under the influence of Sheala’s insidious spell. Unfortunately, we can’t help here, so we turn around and go home.
Epilogue.
Killers of kings.
Upon arrival in the city, Vernon Roche will meet us and inform us that Summer is waiting for Geralt at the market square. Having rolled our eyes, we stomp to the meeting place. Along the way, we will stumble upon marauders who are ransacking Iorvet's body. The elf, thank God, is alive, but he urgently needs help. And while Triss (if you saved her, of course) will treat our comrade, we continue our journey. Having met your main enemy face to face, you will again be faced with a choice. Ask witcher or challenge him to a duel. If you decide that a fight is not the best solution, then drink vodka with your “colleague” and find out about his motives. It turns out that Leto killed only in order to revive the witcher school in which he grew up, and in which he was taught everything he knows. If the witcher’s arguments do not seem convincing to you, you can still kill him.
This is where the events of the second part of The Witcher end. Geralt's name has been cleared, the Assassins of Kings are finished, and our witcher sets off for new adventures in the company of either the charming Triss Merigold or his faithful comrade Vernon Roche.


